With almost everyone having a camera phone on hand, people nowadays take photos of everything - their food, the places they go, their outfits, accessories they wear, happenings and the list can go on and on. Taking photos, editing and uploading them online has been part and parcel of my daily life. Mobile cameras are so good (esp the iPhone 5!) that we don't really have to bring a camera out to take group photos etc, and with so many photo editing apps available at the app store, we can just edit the photos straightaway without having to transfer them into our computers at all!

Here's a list of photo editing apps i use on my iPad but i will focusing on 美图秀秀 in this post!
When my friend first introduced 美图秀秀 (mei tu xiu xiu) to me, i was quite skeptical about it. After all it's a Chinese app and i can't really read Chinese so i hesitated and rely on other editing apps instead. Until one day i randomly decided to download it and after figuring out how to use it, it has been my all time favourite photo editing app even till today! I will go around telling my friends how awesome this editing app is and give them "crash course" on how to use it, LOLOLOL
For those who have been using this 美图秀秀 app already, good for you. For those who haven't or is skeptical about all the Chinese wordings in it, i've decided to do a "guide" for you guys in this post! Maybe you'll change your mind?
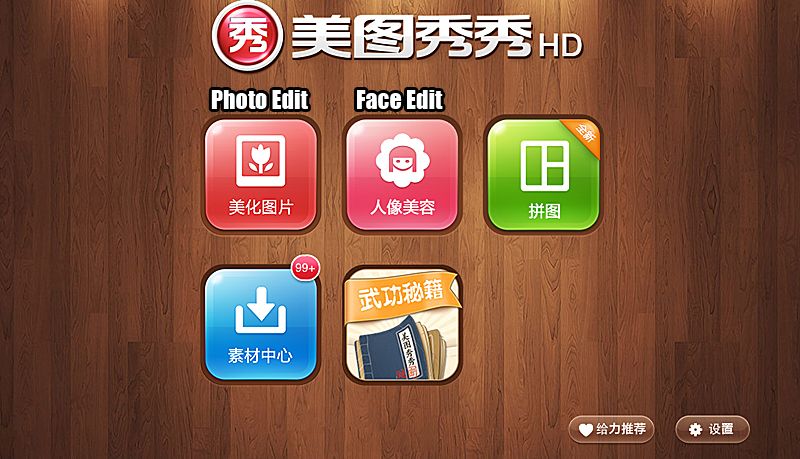
Main menu. I think what's important is the first 2 icon. No idea what the rest means. LOL
In this post, i will be editing a raw photo of myself (camwhore selfie, LOL) taken directly using my iPad camera, and edit it using 美图秀秀 to make it as a display picture for my social media platforms! First I'll do some editing to the face.
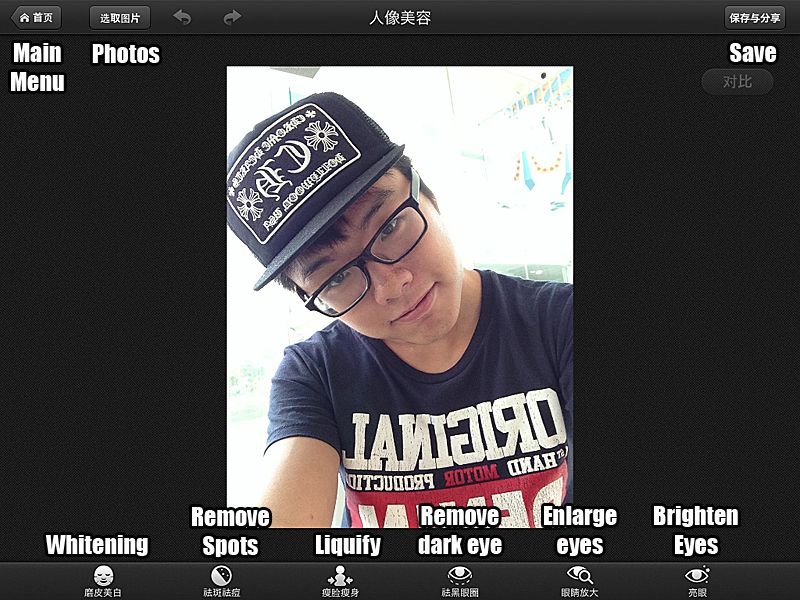
I very nice one. Help you all translate the Chinese words to English so you all can understand better.
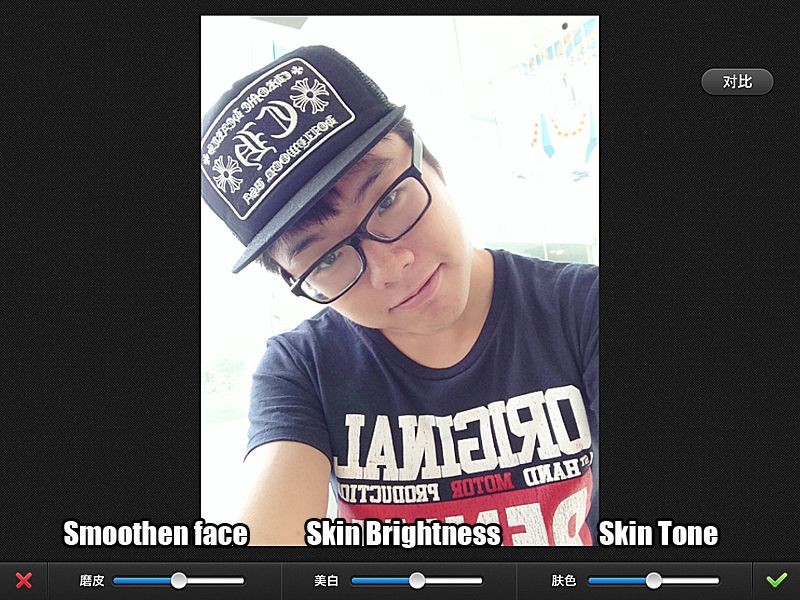
My first step is to whiten/ smoothen the face to remove the flaws.
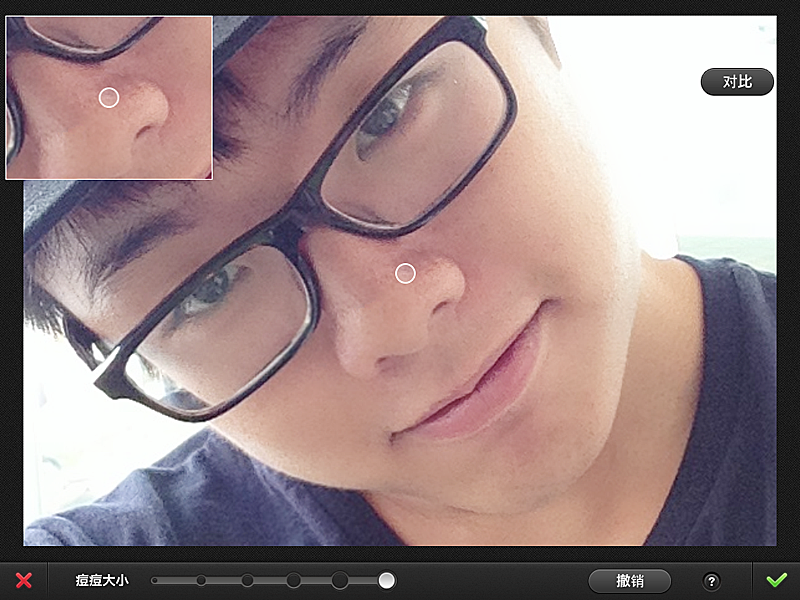
After which remove the spots such as pimples etc. You can choose the size to cover at the bottom.
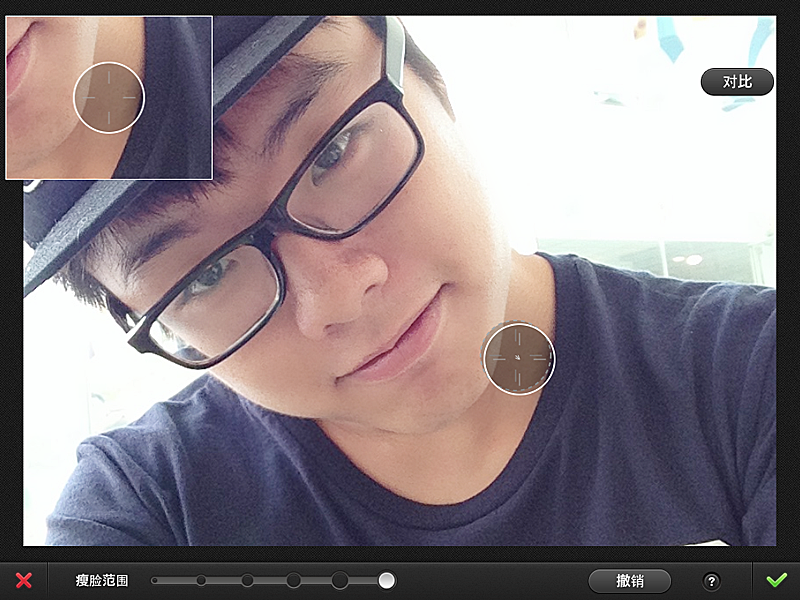
This is one of the most amazing feature which is like Liquify in Photoshop! Want a more define jawline, or taller nose bridge? Just simple "push" in accordingly. The results is really amazing. At any point of time, you can undo/ redo (:
After which you can use the other features such as remove your dark eye ring, enlarge your pupils, brighten up your enlarge eyes (LOL!) and soon you should have a flawless face! I know it feels as if you are cheating the people looking at your photos but obviously don't do it until so kua zhang lah! Just touch up abit to remove the flaws. Understand? LOL

After you are done with your face, remember to save your photo at the top right hand corner!

Here's the original photo and the one edited on the right. Now it's time to enhance the photo!
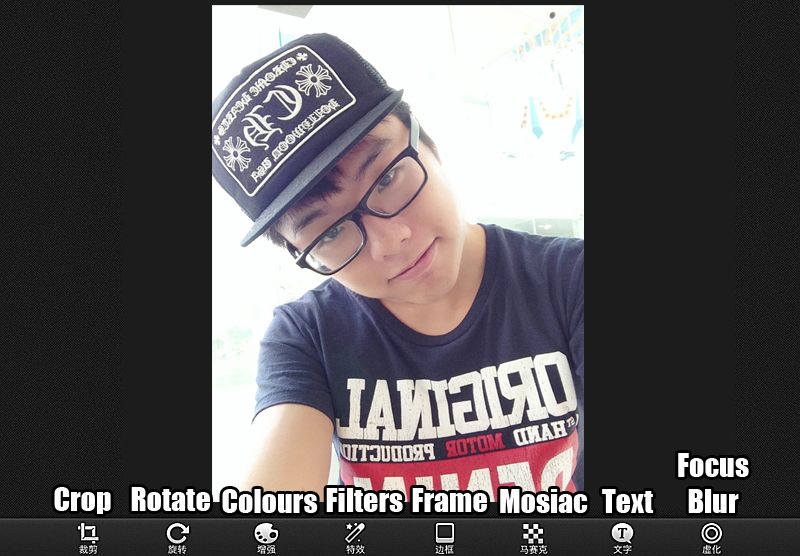
Another range of photo enhancing features which i have nicely translated for you guys *flicks hair*

First up, i decided to crop the photo to the square format so that i can post on instagram!

I have no idea why the photo is mirror imaged so i have to flip it back to the correct side.
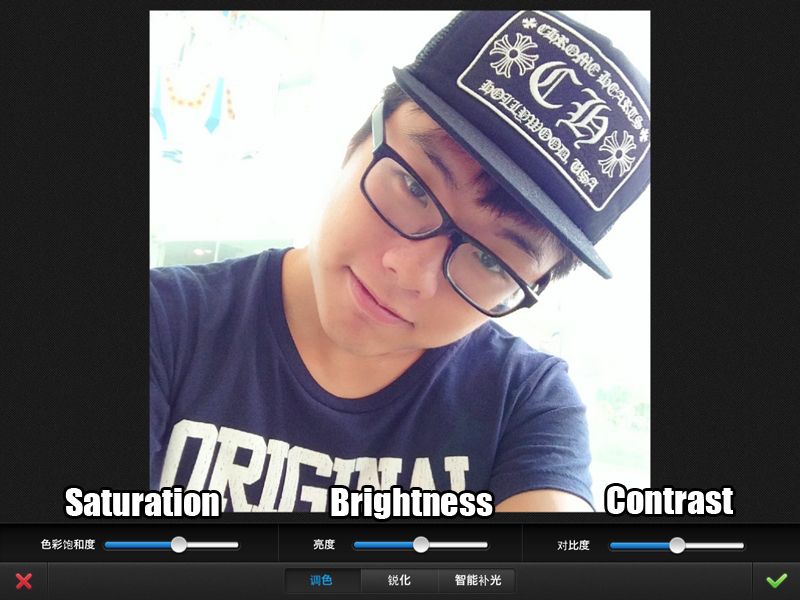
You can also use the "Colours" feature to enhance the colours of your photos!

What i really like about 美图秀秀 is the wide array of filters! Love the bokeh one a lot!
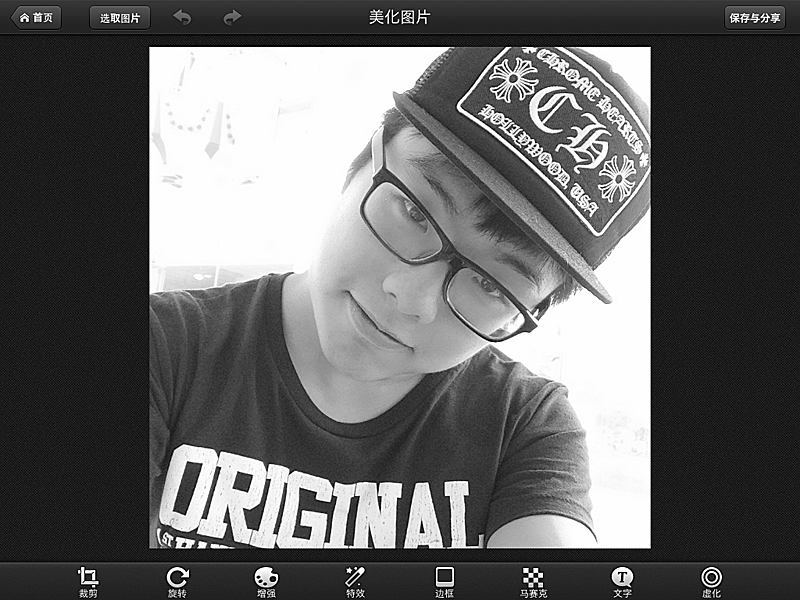
TA-DAH!!! Decided to settle for the Black and White one for my display pic! :D
All in all it seems quite easy right! The liquifying part might be difficult at the start but after you "master" the technique and know which are the areas of your face you are not satisfied with and you want to liquify, everything becomes a routine! Of course, 美图秀秀 is not all about editing your face to perfection but it can also be used to edit purely photos.
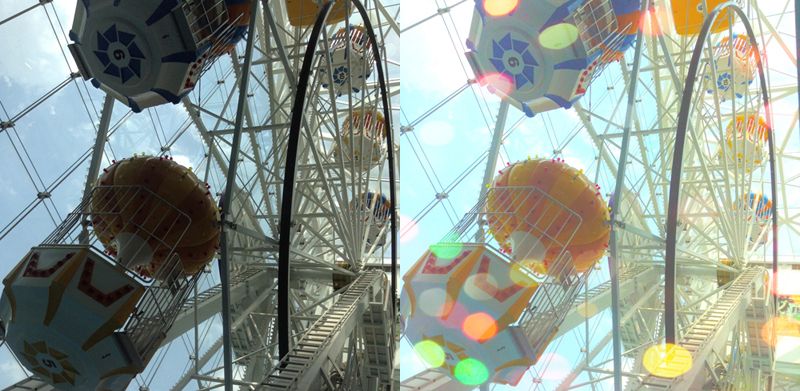
Look at the difference compared to the original photo! The end result had a dreamy effect! ♥
That's all i have for this 美图秀秀 guide. So for those who have yet to download 美图秀秀 or is looking for a good photo editing app on your phone, are you going to try it out now? An advice from me - Practice makes perfect! HAHAHHAHA
Instagram: http://instagram.com/andystorm
Twitter: http://twitter.com/andystorm
When my friend first introduced 美图秀秀 (mei tu xiu xiu) to me, i was quite skeptical about it. After all it's a Chinese app and i can't really read Chinese so i hesitated and rely on other editing apps instead. Until one day i randomly decided to download it and after figuring out how to use it, it has been my all time favourite photo editing app even till today! I will go around telling my friends how awesome this editing app is and give them "crash course" on how to use it, LOLOLOL
For those who have been using this 美图秀秀 app already, good for you. For those who haven't or is skeptical about all the Chinese wordings in it, i've decided to do a "guide" for you guys in this post! Maybe you'll change your mind?

Main menu. I think what's important is the first 2 icon. No idea what the rest means. LOL
In this post, i will be editing a raw photo of myself (camwhore selfie, LOL) taken directly using my iPad camera, and edit it using 美图秀秀 to make it as a display picture for my social media platforms! First I'll do some editing to the face.

I very nice one. Help you all translate the Chinese words to English so you all can understand better.

My first step is to whiten/ smoothen the face to remove the flaws.

After which remove the spots such as pimples etc. You can choose the size to cover at the bottom.

This is one of the most amazing feature which is like Liquify in Photoshop! Want a more define jawline, or taller nose bridge? Just simple "push" in accordingly. The results is really amazing. At any point of time, you can undo/ redo (:
After which you can use the other features such as remove your dark eye ring, enlarge your pupils, brighten up your enlarge eyes (LOL!) and soon you should have a flawless face! I know it feels as if you are cheating the people looking at your photos but obviously don't do it until so kua zhang lah! Just touch up abit to remove the flaws. Understand? LOL

After you are done with your face, remember to save your photo at the top right hand corner!

Here's the original photo and the one edited on the right. Now it's time to enhance the photo!

Another range of photo enhancing features which i have nicely translated for you guys *flicks hair*

First up, i decided to crop the photo to the square format so that i can post on instagram!

I have no idea why the photo is mirror imaged so i have to flip it back to the correct side.

You can also use the "Colours" feature to enhance the colours of your photos!

What i really like about 美图秀秀 is the wide array of filters! Love the bokeh one a lot!

TA-DAH!!! Decided to settle for the Black and White one for my display pic! :D
All in all it seems quite easy right! The liquifying part might be difficult at the start but after you "master" the technique and know which are the areas of your face you are not satisfied with and you want to liquify, everything becomes a routine! Of course, 美图秀秀 is not all about editing your face to perfection but it can also be used to edit purely photos.

Look at the difference compared to the original photo! The end result had a dreamy effect! ♥
That's all i have for this 美图秀秀 guide. So for those who have yet to download 美图秀秀 or is looking for a good photo editing app on your phone, are you going to try it out now? An advice from me - Practice makes perfect! HAHAHHAHA
Instagram: http://instagram.com/andystorm
Twitter: http://twitter.com/andystorm
